

Flooring installation can be a significant home improvement project that not only enhances the aesthetic appeal of your home but also increases its value. Whether you are planning to install hardwood, laminate, tile, or carpet, preparing your home for flooring installation is crucial for ensuring a smooth and efficient process.
Follow these steps on how to prepare your home for flooring installation. Proper preparation helps to prevent damage to your home, facilitates easier installation for the workers, and can even help you avoid extra costs.
Understanding the Basics
Before diving into the preparation steps, it’s essential to understand the scope of your flooring project. Each type of flooring might require different preparatory steps. Hardwood and laminate need a clean and level subfloor, while tile installation might require backer boards or a waterproofing membrane, especially in wet areas.
Carpeting, on the other hand, often requires tack strips and a smooth surface for padding.
Regardless of the flooring type, there are several universal steps you should follow to get your home ready for the new floors.
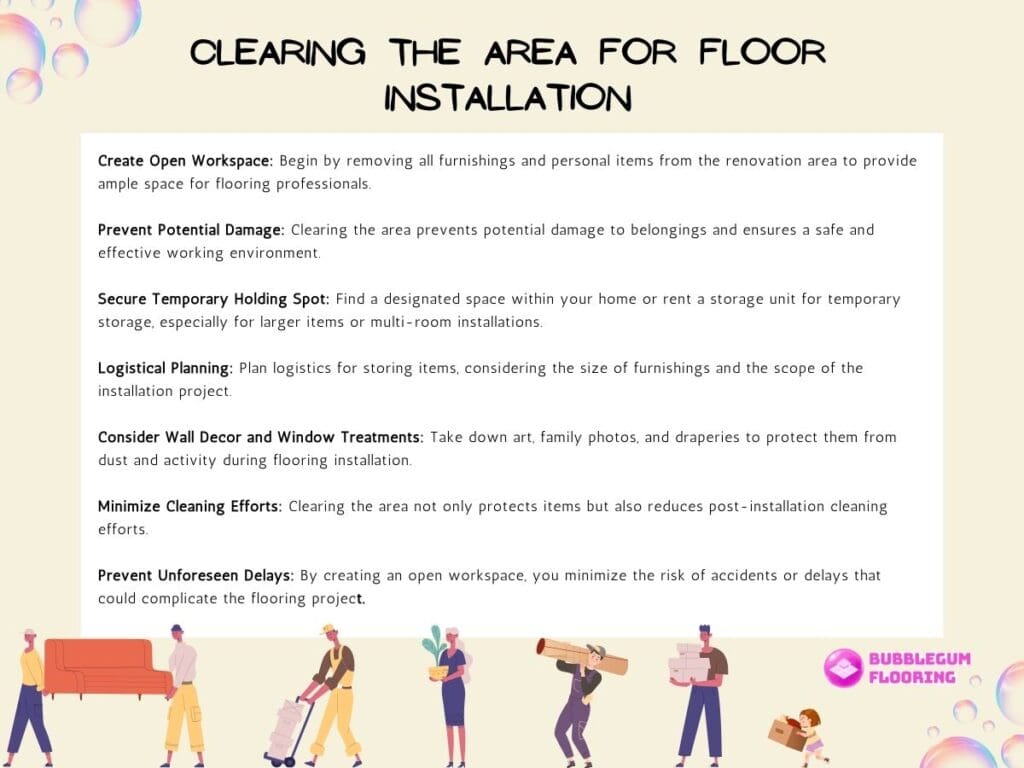
Step 1: Clearing the Area
The initial step in the flooring installation journey begins with creating an open workspace, which involves the meticulous removal of all your furnishings and personal items from the area slated for renovation. This pivotal step cannot be understated, as it serves to prevent any potential damage to your treasured possessions and ensures there is ample room for the flooring professionals to maneuver and work effectively.
Securing a temporary holding spot for your items is essential, whether it’s a designated, unused space within your home or a storage unit you’ve rented specifically for this purpose. This might require some logistical planning, especially for larger pieces or if the installation spans multiple rooms.
Additionally, it’s crucial to consider your wall décor and window treatments. Pieces of art, family photos, and draperies should be taken down to safeguard them from the inevitable dust and activity that comes with flooring installation.
Not only does this step protect your items, but it also minimizes cleaning efforts post-installation and reduces the risk of any unforeseen accidents or delays that could complicate the flooring project.
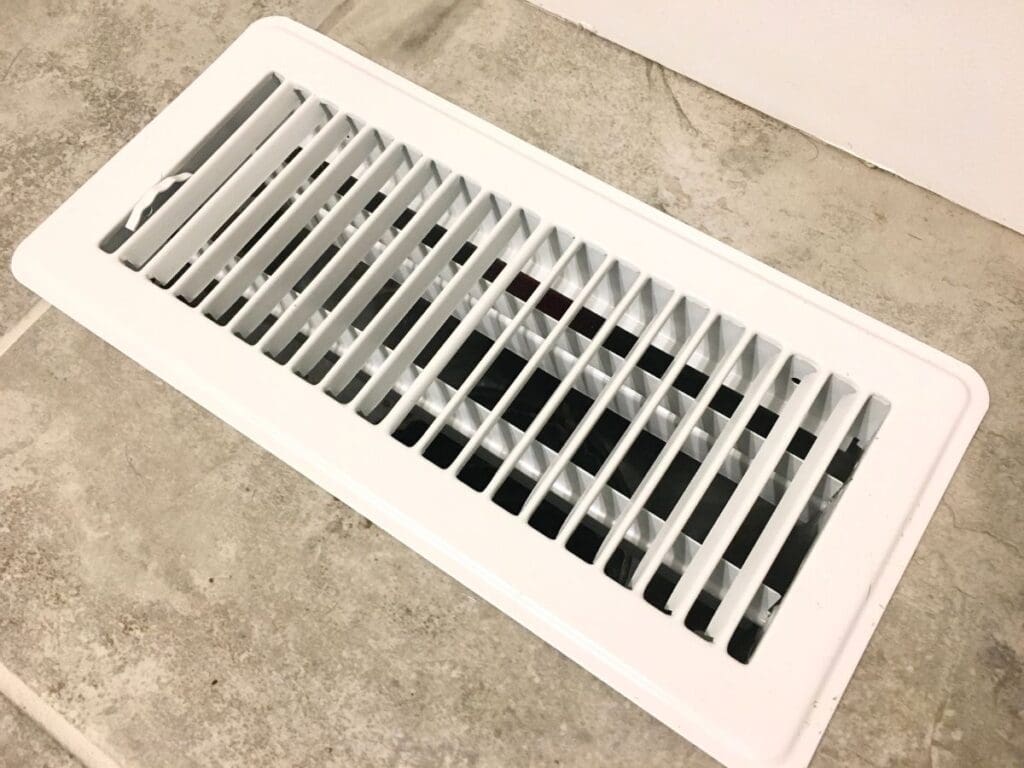
Step 2: Addressing Fixtures and Fittings
Continuing with the process, attention must also be given to the structural components within the installation zone.
To ensure a smooth and successful flooring installation, it is crucial to consider the structural elements within the work area. Remove or secure doors that swing into the space to prevent obstruction and protect them from damage.
Carefully detach floor-mounted air registers to avoid damage and store them securely. Anticipate the change in floor height due to the new flooring material and adjust door lengths accordingly. Planning for these adjustments will prevent last-minute issues and ensure a professional-looking finish.
Step 3: Handling Appliances and Plumbing Fixtures
In rooms that serve specific functions such as kitchens, bathrooms, and laundry rooms, the preparation takes on additional complexity due to the presence of large appliances and plumbing fixtures.
These spaces require careful consideration and often, the expertise of a professional to ensure that appliances like refrigerators, stoves, washers, and dryers are disconnected and moved safely, without any damage to the existing plumbing or electrical infrastructure.

In the case of bathrooms, the question of whether or not to remove the toilet will arise, as it may impact the flooring installation process. This is especially true if the new flooring has a different thickness or if it needs to run seamlessly under the toilet base for a cleaner look and better waterproofing.
A professional plumber or the flooring installation team can provide invaluable guidance on the best approach to take. Engaging with experts not only ensures the integrity of your utilities but also helps in averting any potential water damage or electrical hazards that could result from an incorrect disconnection.
Therefore, investing in professional services for this part of the preparation could save time and prevent costly mistakes.
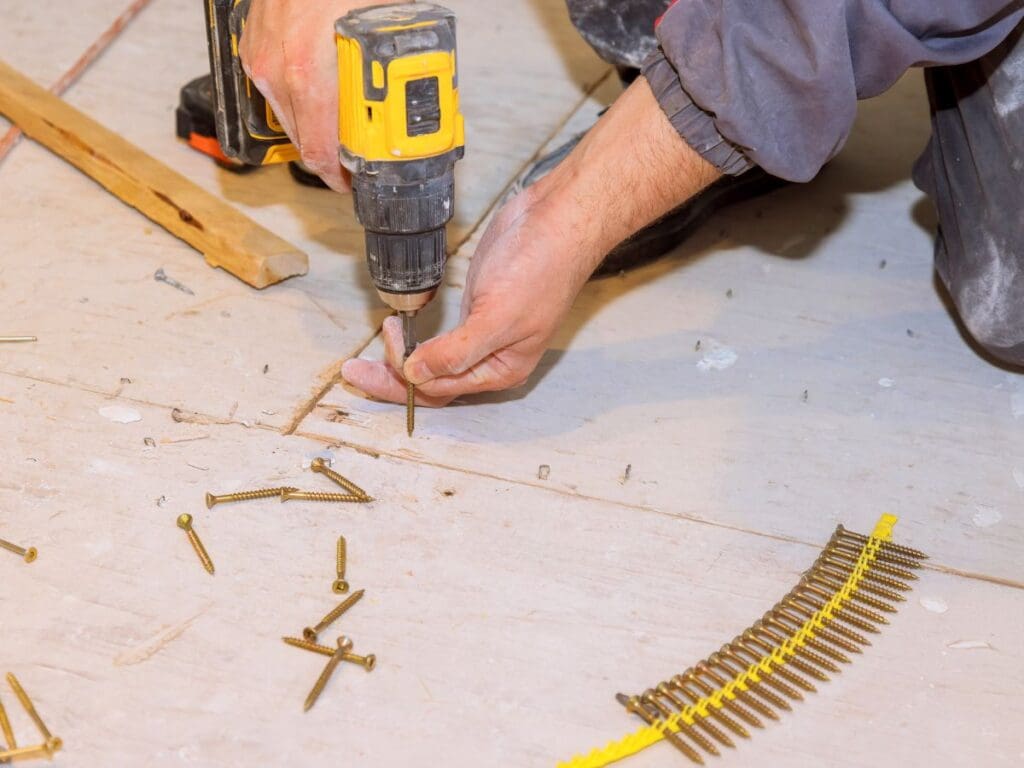
Step 4: Preparing the Subfloor
Once you’ve cleared the room, the next step is to get the subfloor ready for your new flooring. This means thoroughly cleaning it to remove any dirt, debris, or nails. A level surface is crucial, so be sure to fix any bumps or dips which could affect the new flooring.
If you’re laying down hardwood or laminate, the subfloor needs to be not just clean and level, but also dry. Check the moisture level of the subfloor to ensure it meets the requirements for your specific flooring type, as too much moisture can cause damage later.
Preparing the subfloor carefully is key to ensuring the best results for your new flooring installation.
Step 5: Checking Doorways and Trim
Before the installation commences, it’s important to assess the door casings and baseboards. The thickness of your new flooring may necessitate the trimming of door casings to accommodate the material beneath.
Regarding baseboards and moldings, you’ll need to choose between replacing them for a fresh look or maintaining the existing ones for consistency. If you opt to keep the current baseboards, they must be detached with caution to prevent damage and then securely refitted once the flooring is installed, ensuring a clean, cohesive appearance throughout the room.
Step 6: Acclimatizing the Flooring Material
Acclimation is an important preparatory step when installing natural flooring materials, such as hardwood. These materials must adapt to the temperature and humidity conditions of their future setting to mitigate post-installation issues like expansion, contraction, warping, or the formation of gaps between planks.
To ensure the integrity of your flooring, adhere strictly to the manufacturer’s guidelines on acclimation time, which may vary based on the type of wood and the climate of your location. Ignoring this step can compromise the flooring’s fit and finish, so plan for this phase well in advance of the actual installation.
Step 7: Ensuring Accessibility and Safety
It’s also vital to establish a safe and unobstructed route for the installation crew and their materials to access the work area. Ensure that the pathway is free from tripping hazards such as loose rugs, cables, or clutter that could pose a risk to the safety of the workers or the efficiency of their work.
Securing pets in a separate area is equally important to prevent any disruptions and to keep both the pets and workers safe. If the room being worked on has an exterior door, it’s worth considering creating a direct entry point for the installation team.
This minimizes the disturbance to the rest of your home and helps to keep your space clean, limiting the tracking in of dirt or debris. Providing a clear and direct path can greatly streamline the installation process and reduce the risk of accidents or damage to your home.
Step 8: Addressing the Old Flooring
As part of your preparation, it’s essential to determine the removal strategy for your old flooring. While some installation companies offer removal services, this typically comes with an additional cost.
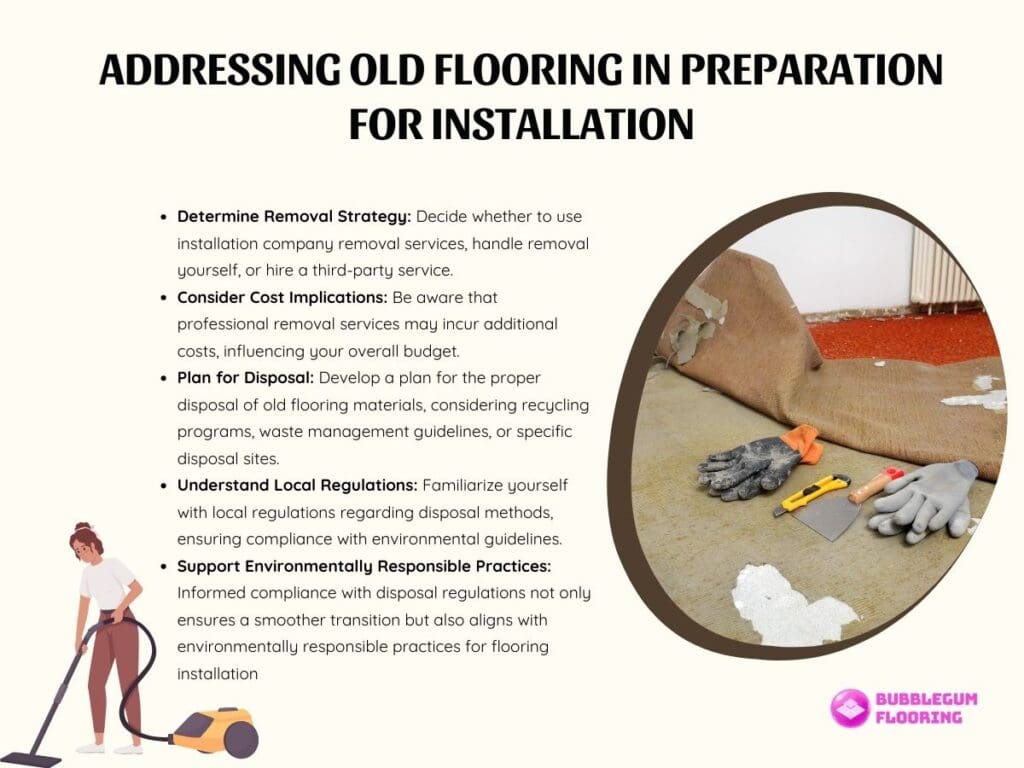
Alternatively, you may opt to handle the removal yourself or employ a third-party service to do so. Whichever route you choose, it’s crucial to have a plan in place for the proper disposal of the old materials.
Disposal methods vary depending on the type of flooring and local regulations, which may include recycling programs, waste management guidelines, or specific disposal sites for construction materials.
Ensuring that you’re informed about and compliant with these regulations not only facilitates a smoother transition but also supports environmentally responsible practices.
Step 9: Managing Dust and Debris
The installation process can be quite messy, often generating a considerable amount of dust and debris. To protect the rest of your home from this influx of particulate matter, it’s a good practice to isolate the work area.
This can be effectively done by using plastic sheeting to seal off doorways and openings, thus containing the dust within the work zone. Not only does this aid in maintaining cleaner living spaces, but it also reduces post-installation clean-up efforts.
Make sure that the sheeting is secured firmly to prevent any dust from escaping, especially if there will be any sanding involved or if old flooring material is being removed. Taking this precautionary measure helps ensure that your home remains as dust-free as possible during the renovation process.
Step 10: Scheduling and Planning
Effective communication with your flooring installers is key to a smooth installation process. Prior to the commencement of the project, confirm the date and time of installation to ensure everyone is on the same page.
It’s also wise to have a clear understanding of the projected timeline, which can help you manage expectations and plan around the installation. Discuss with the installers what the process will entail and inquire about any additional steps that may be necessary post-installation, such as sealing or adding finishing touches.
Knowing these details in advance allows you to anticipate the duration of the project and prepare for any follow-up actions required to complete your new flooring. This proactive approach can help mitigate any misunderstandings and ensure a seamless and efficient installation experience.
There You Have It!
Preparing your home for new flooring installation involves several important steps to ensure a smooth and efficient process. By meticulously preparing for the arrival of your new flooring, you can facilitate a successful installation and enjoy your new floors without unexpected complications.